**How to Design the Bubble Mailer: A Comprehensive Guide**
In the world of shipping and packaging, bubble mailers have become a staple for businesses and individuals alike. These padded envelopes not only provide protection for fragile items but also offer a lightweight and cost-effective solution for mailing. If you’re looking to design your own bubble mailer, whether for branding purposes or to enhance the unboxing experience for your customers, this guide will walk you through the essential steps to create an effective and appealing bubble mailer.
### Understanding the Basics of Bubble Mailers
Before diving into the design process, it’s important to understand what a bubble mailer is. Typically made from a combination of durable paper or plastic and lined with bubble wrap, these mailers are designed to cushion items during transit. They come in various sizes and colors, making them versatile for different shipping needs.
### Step 1: Define Your Purpose
The first step in designing a bubble mailer is to define its purpose. Are you shipping delicate items like jewelry, electronics, or clothing? Or are you looking to create a promotional mailer for marketing purposes? Understanding the primary function of your bubble mailer will guide your design choices, including size, material, and branding elements.

### Step 2: Choose the Right Size
Bubble mailers come in various sizes, so selecting the right one is crucial. Measure the items you plan to ship and choose a mailer that provides enough space for cushioning without being excessively large. A snug fit will help minimize movement during transit, reducing the risk of damage.
### Step 3: Select the Material
The material of your bubble mailer plays a significant role in its durability and appearance. Common materials include:
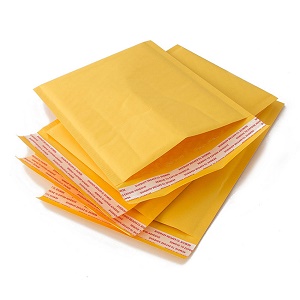
- **Kraft Paper**: Eco-friendly and sturdy, kraft paper bubble mailers are great for a natural look.
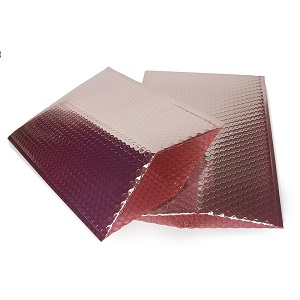
- **Polyethylene**: These plastic mailers are waterproof and tear-resistant, making them ideal for shipping items that need extra protection from the elements.
Consider your brand’s values and the items you’re shipping when selecting the material.
### Step 4: Incorporate Branding Elements
Your bubble mailer is an extension of your brand, so incorporating branding elements is essential. Here are some ideas:
- **Logo**: Print your logo prominently on the front of the mailer. This not only enhances brand recognition but also adds a professional touch.
- **Color Scheme**: Use colors that align with your brand identity. Bright colors can attract attention, while muted tones may convey elegance.
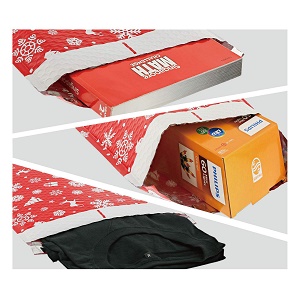
- **Custom Prints**: Consider adding patterns, graphics, or even a tagline that reflects your brand’s personality. Custom prints can make your mailer stand out in a sea of plain envelopes.
### Step 5: Add Functional Features
While aesthetics are important, functionality should not be overlooked. Here are some features to consider:
- **Self-Sealing Closure**: Ensure your bubble mailer has a reliable self-sealing closure to keep items secure during transit.
- **Tear-Strip Opening**: A tear-strip allows for easy opening, enhancing the customer experience.
- **Recyclable Options**: If sustainability is a priority for your brand, look for recyclable or biodegradable materials.
### Step 6: Test and Iterate
Once you have a design in mind, create a prototype of your bubble mailer. Test it with the items you plan to ship to ensure it provides adequate protection and meets your branding goals. Gather feedback from colleagues or potential customers and be open to making adjustments.
### Conclusion
Designing a bubble mailer is an exciting opportunity to showcase your brand while ensuring the safe delivery of your products. By defining your purpose, selecting the right size and material, incorporating branding elements, and adding functional features, you can create a bubble mailer that not only protects but also delights your customers. Remember, the unboxing experience starts with the packaging, so make it count!
Post time: Jun-25-2025